Tag

Responsive Design

Browsing

Web development is constantly evolving, and mastering CSS is essential for creating visually appealing and functional websites. Whether you’re a beginner or an experienced developer, learning advanced techniques can significantly enhance your workflow and design capabilities.

From the GitHub repository “css tips tricks,” we’ve gathered practical insights to help you streamline your projects. These strategies cover everything from layout optimization to performance improvements, ensuring your websites stand out in today’s competitive digital landscape.

This article provides a comprehensive guide to advanced techniques and best practices. By applying these methods, you’ll not only save time but also deliver exceptional user experiences. Let’s dive into the world of modern web development and unlock the full potential of CSS.

Key Takeaways

  • Learn advanced CSS techniques to enhance your web design skills.
  • Optimize layouts for better user experiences.
  • Improve website performance with practical tips.
  • Streamline your workflow using proven strategies.
  • Stay updated with modern web development trends.

Discovering the Power of CSS in Modern Web Development

The evolution of web design owes much to the creative potential of CSS. It has transformed how developers approach layouts, interactivity, and user experiences. By leveraging advanced techniques, you can unlock new possibilities for your projects.

One of the most exciting aspects of CSS is its ability to enable unique modes of design. For instance, writing modes allow text to flow vertically or horizontally, adding a creative twist to layouts. These features empower developers to innovate without relying on additional frameworks.

Creative tricks also play a significant role in modern web development. Custom cursors, responsive grids, and dynamic hover effects are just a few examples. These techniques not only enhance functionality but also improve user engagement.

Critical properties like clip-path and mask-image allow for dynamic styling. They enable developers to create custom shapes and visual effects directly within the browser. These tools are practical and efficient, as demonstrated in the GitHub repository “css tips tricks.”

Here are some practical examples of CSS in action:

  • Custom cursors that adapt to user interactions.
  • Responsive layouts that adjust seamlessly across devices.
  • Dynamic animations that enhance visual appeal.

By mastering these techniques, you can elevate your web development skills and deliver exceptional user experiences. The power of CSS lies in its ability to combine creativity with functionality, making it an indispensable tool for modern developers.

Understanding the Importance of CSS for Web Developers

Modern websites demand a balance of functionality and aesthetics, achievable through advanced techniques. Mastering these tools is essential for developers aiming to create engaging and visually appealing web pages. One of the most critical aspects is the ability to manipulate visual elements like images and individual components to add depth and creativity.

For instance, background image techniques allow developers to enhance layouts without compromising performance. By using properties like background-size and background-position, you can ensure that visuals align perfectly with the design. Additionally, fallback values play a crucial role in maintaining design integrity, even if an image fails to load.

Text clipping is another powerful tool that adds visual value to your designs. With properties like clip-path, you can create custom shapes and effects directly within the browser. These techniques not only improve design consistency but also enhance the overall user experience.

Here’s why these methods matter:

  • They ensure that your website remains visually appealing across all devices.
  • Fallback values guarantee that the design stays intact, even if resources fail to load.
  • Effective styling of elements improves usability and engagement.

By leveraging these advanced techniques, developers can create websites that are both functional and visually stunning. The ability to control and manipulate visual elements is a cornerstone of successful web development, ensuring that your projects stand out in today’s competitive digital landscape.

Responsive Documentation Layout with CSS Grid

CSS Grid revolutionizes how developers approach responsive design for documentation. This powerful tool simplifies the creation of flexible and adaptive layouts, ensuring content looks great on any device. Whether you’re building a technical guide or a user manual, CSS Grid offers a streamlined solution.

One of the most effective strategies is the two-line grid layout. This approach splits the available space optimally, balancing content and whitespace. It ensures readability and consistency across different screen sizes.

Creating a Responsive Docs Layout

To create a responsive documentation layout, start by defining a grid container. Use the display: grid property to activate the grid system. Then, set up columns and rows using grid-template-columns and grid-template-rows.

Here’s a simple example:

.container {
  display: grid;
  grid-template-columns: 1fr 2fr;
  grid-gap: 20px;
}

This code creates a two-column layout with a 20px gap between items. The first column takes up one fraction of the space, while the second column takes up two fractions. This ensures a balanced and responsive design.

Key CSS Grid Properties Explored

Several properties make CSS Grid a versatile tool for responsive layouts. Here are the most important ones:

  • grid-template-columns: Defines the number and size of columns.
  • grid-gap: Sets the spacing between grid items.
  • fr unit: Represents a fraction of the available space.

These properties work together to create layouts that adapt seamlessly to different screen sizes. By mastering them, you can design documentation that is both functional and visually appealing.

Property Description
grid-template-columns Defines the structure of columns in the grid.
grid-gap Sets the spacing between grid items.
fr unit Represents a fraction of the available space.

CSS Grid is a game-changer for responsive documentation layouts. Its simplicity and effectiveness make it an essential tool for modern web development. By leveraging its features, you can create designs that are both functional and visually stunning.

Exploring Custom Cursors and Interactive Hover Effects

Customizing user interactions can transform the way visitors experience a website. By implementing unique custom cursors and interactive hover effects, developers can create distinct and engaging designs. These techniques not only enhance aesthetics but also provide visual cues that improve usability.

Implementing Unique Custom Cursors

Custom cursors allow developers to replace the default pointer with creative designs. This can include icons, animations, or even interactive elements that respond to user actions. Here’s a simple example:

body {
cursor: url('custom-cursor.png'), auto;
}

This code replaces the default cursor with a custom image. Developers can also use SVG files for scalable and high-quality designs. Custom cursors add a personal touch and can align with the website’s branding or theme.

Enhancing User Experience with Hover Effects

Interactive hover effects are another powerful tool for engaging users. These effects can highlight buttons, links, or images when users hover over them. For example:

button:hover {
background-color: #ff6347;
transform: scale(1.1);
}

This code changes the button’s background color and scales it slightly when hovered. Such effects provide immediate feedback, making the website feel more responsive and dynamic.

Here’s a summary of key properties for custom cursors and hover effects:

Property Description
cursor Defines the custom cursor image or style.
:hover Applies styles when an element is hovered over.
transform Modifies the size, rotation, or position of an element.

By mastering these techniques, developers can create more interactive and visually appealing websites. These tips are designed to help you elevate your designs and provide a memorable user experience.

Advanced Text Styling Techniques

Text styling is a powerful tool for creating visually engaging web designs. By using advanced techniques, you can make your text stand out and leave a lasting impression on your audience. From filling text with images to adding strokes and animations, these methods elevate your design to a professional level.

Filling Text with Images for Impact

One of the most creative ways to style text is by filling it with images. This technique uses background images to give your text a unique and dynamic appearance. Here’s how you can achieve this effect:

h1 {
background-image: url('image.jpg');
-webkit-background-clip: text;
color: transparent;
}

This code applies an image to the text, making it visually striking. Always include a fallback color to ensure readability if the image fails to load. For example:

h1 {
background-color: #000;
}

Adding Stroke and Emphasis to Improve Legibility

Adding a stroke to your text can enhance its legibility, especially on busy backgrounds. The text-stroke property allows you to outline your text, making it pop. Here’s an example:

h2 {
-webkit-text-stroke: 2px #fff;
color: #000;
}

This creates a white outline around black text, ensuring it remains readable. Combining this with animation can add a dynamic touch. For instance, you can animate the stroke color to draw attention.

Here’s why these techniques matter:

  • They make your text visually appealing and engaging.
  • Fallback colors ensure readability across all devices.
  • Animation adds interactivity, enhancing user experience.

By mastering these advanced text styling techniques, you can create designs that are both functional and visually stunning. These methods are essential for achieving professional-grade web design.

Dynamic States with Pseudo-Classes and Pseudo-Elements

Pseudo-classes and pseudo-elements offer developers powerful tools for creating interactive designs. These features allow you to target specific states or parts of an element, enabling dynamic styling that enhances user engagement. By mastering these techniques, you can craft interfaces that are both functional and visually appealing.

Styling Media Elements in Paused States

One practical example of pseudo-classes is styling media elements like videos when they are paused. The :paused pseudo-class lets you apply custom styles to a video that is not playing. For instance, you can add a subtle overlay or change the play button’s appearance to indicate the paused state.

video:paused {
opacity: 0.8;
border: 2px solid #ff6347;
}

This code reduces the video’s opacity and adds a red border when paused. Such style adjustments provide visual feedback, improving the user experience.

Utilizing First-Letter and First-Line Effects

Pseudo-elements like ::first-letter and ::first-line allow for creative text styling. These techniques are particularly useful for enhancing the visual appeal of paragraphs. For example, you can make the first letter of a paragraph larger or apply a unique font.

p::first-letter {
font-size: 2.5em;
font-weight: bold;
color: #ff6347;
}

This code enlarges the first letter, making it bold and red. Similarly, the ::first-line pseudo-element can be used to style the first line of text differently, adding emphasis and improving readability.

Here’s why these techniques matter:

  • They enhance interactivity by providing visual cues.
  • Creative style adjustments improve user engagement.
  • These methods contribute to a polished and professional design.
Technique Purpose
:paused Styles media elements when paused.
::first-letter Enhances the first letter of a paragraph.
::first-line Styles the first line of text for emphasis.

By mastering pseudo-classes and pseudo-elements, you can create designs that are both functional and visually stunning. These techniques are essential for achieving a refined user interface and delivering exceptional user experiences.

Leveraging Fallback Values and CSS Variables

Fallback values and CSS variables are essential tools for modern web development. They ensure design consistency and simplify theme management, making your workflow more efficient. By using these techniques, you can safeguard your designs against unexpected issues and improve the overall user experience.

Implementing Fallbacks in Color and Style

Fallback values act as a safety net when a CSS variable is undefined. For example, if a custom property fails to load, the fallback ensures the design remains intact. Here’s how you can implement a fallback for a color variable:

background-color: var(--primary-color, #3498db);

In this example, if --primary-color is not defined, the browser defaults to #3498db. This approach is particularly useful for maintaining design consistency across different scenarios.

Reusing Values with Custom Properties

CSS variables, also known as custom properties, allow you to reuse values throughout your stylesheet. This simplifies theme management and makes updates easier. For instance, you can define a primary color once and use it across multiple elements:

:root {
--primary-color: #3498db;
}

button {
background-color: var(--primary-color);
}

By changing the value of --primary-color, you can update the entire theme with minimal effort. This approach enhances maintainability and ensures a consistent design.

Here are the key benefits of using fallback values and CSS variables:

  • They safeguard your designs against missing variable definitions.
  • Custom properties simplify theme management and improve workflow efficiency.
  • Fallback values ensure design consistency, even in unexpected scenarios.
  • These techniques enhance both developer workflow and end-user experience.

By mastering fallback values and CSS variables, you can create more robust and maintainable designs. These strategies are essential for modern web development, ensuring your projects are both functional and visually appealing.

Mastering Writing Modes for Creative Layouts

Creative layouts often require innovative approaches to text flow and design. Writing modes, a powerful feature in modern web development, allow developers to control the direction of text. This can significantly enhance the visual appeal and functionality of a website.

Creative layouts with writing modes

By altering the writing-mode property, you can switch between horizontal and vertical text flows. This flexibility is particularly useful for creating unique designs that stand out. For example, vertical text is commonly used in East Asian languages, but it can also add a creative touch to English layouts.

Vertical vs. Horizontal Text Flow

Vertical text flow is ideal for designs that require a compact layout or a traditional aesthetic. It’s often used in articles or sidebars to save space. Here’s how you can implement it:

.vertical-text {
writing-mode: vertical-rl;
}

Horizontal text flow, on the other hand, is the default and works well for most experiences. It’s easier to read and aligns with user expectations. Here’s an example:

.horizontal-text {
writing-mode: horizontal-tb;
}

When choosing between vertical and horizontal layouts, consider the following:

  • Vertical text is great for creative designs but may reduce readability for longer content.
  • Horizontal text is more familiar and works best for most user queries.
  • Use vertical text sparingly to maintain a balance between creativity and usability.

By mastering writing modes, you can create layouts that are both visually appealing and functional. These techniques allow you to experiment with text flow, adding a unique touch to your designs while ensuring a seamless user experience.

Innovative Animation Techniques with CSS

Dynamic visuals are key to capturing user attention effectively. By leveraging advanced animation techniques, you can create designs that are both engaging and interactive. Whether it’s a subtle hover effect or a continuous loop, animations add life to your web pages.

One of the most captivating techniques is the continuous rainbow animation. This effect uses keyframes to transition through a spectrum of colors, creating a seamless loop. Here’s how you can implement it:

@keyframes rainbow {
  0% { background-color: red; }
  25% { background-color: yellow; }
  50% { background-color: green; }
  75% { background-color: blue; }
  100% { background-color: red; }
}

.element {
  animation: rainbow 5s infinite;
}

This code creates a smooth color transition that repeats indefinitely. Such animations are perfect for backgrounds or interactive elements.

Animating Text for Dynamic Visuals

Text animations can make your content stand out. By applying keyframes, you can animate text to move vertically or horizontally, scale, or change color. Here’s an example of a bouncing text effect:

@keyframes bounce {
  0%, 100% { transform: translateY(0); }
  50% { transform: translateY(-20px); }
}

h1 {
  animation: bounce 1s infinite;
}

This code makes the text bounce up and down, adding a playful touch to your design. You can also combine multiple animations for more complex effects.

Here’s why these techniques matter:

  • They grab user attention and improve engagement.
  • Animations can guide users through your content effectively.
  • Dynamic visuals make your website more memorable.

By mastering these animation techniques, you can create designs that are both functional and visually stunning. These methods allow you to experiment with movement and interactivity, ensuring your projects stand out in today’s competitive digital landscape.

Enhancing Designs with Clipping and Masking Techniques

Clipping and masking techniques unlock endless possibilities for creative web design. These methods allow developers to craft unique visuals by controlling the visibility and shape of elements. Whether you’re creating custom shapes or adding dynamic effects, these tools are essential for modern, innovative designs.

Creating Custom Shapes with clip-path

The clip-path property is a powerful tool for defining custom shapes. It allows you to clip an element to a specific area, creating unique designs. For example, you can use polygons to create geometric shapes:

.custom-shape {
clip-path: polygon(50% 0%, 100% 50%, 50% 100%, 0% 50%);
}

This code creates a diamond shape by defining four points. You can also use circles, ellipses, or even SVG paths for more complex designs. These techniques are perfect for adding visual interest to your layouts.

Using Mask Images for Visual Effects

Mask images control the visibility of underlying elements, allowing for creative effects. By applying a mask, you can reveal or hide parts of an element based on the mask’s transparency. Here’s an example:

.masked-element {
mask-image: url('mask.png');
}

In this case, the element will only be visible where the mask image is opaque. This technique is ideal for creating gradients, textures, or intricate patterns. It’s a versatile way to enhance your designs without altering the original content.

Here’s why these techniques matter:

  • They enable the creation of custom shapes and unique visuals.
  • Mask images add depth and texture to your designs.
  • These methods are essential for modern, creative web development.
Technique Use Case
clip-path Creating custom shapes like polygons or circles.
mask-image Controlling visibility with gradients or patterns.

By mastering clipping and masking, you can elevate your designs and create visually stunning websites. These techniques offer endless creative opportunities, making them indispensable for modern web development.

Responsive Techniques Using Attribute Selectors and CSS Grid

Attribute selectors in CSS provide a precise way to target elements based on their attributes. This method allows developers to create adaptable layouts while reducing redundant code. By combining attribute selectors with CSS Grid, you can achieve responsive designs that work seamlessly across devices.

Exploring Attribute Selectors for Precision

Attribute selectors enable you to target specific HTML elements based on their attributes. For example, you can style all links with a specific class or attribute value. Here’s a simple example:

a[href="https://example.com"] {
color: #3498db;
}

This code styles only the links pointing to “https://example.com.” Such precision ensures that your styles are applied exactly where needed, improving clarity and maintainability.

When combined with CSS Grid, attribute selectors can create responsive layouts. For instance, you can target elements with specific attributes and assign them to grid areas. This approach ensures that your design adapts to different screen sizes without extra code.

Benefits of Using Attribute Selectors

Using attribute selectors offers several advantages for modern web development:

  • They reduce redundant code by targeting specific elements directly.
  • Attribute selectors improve design precision, ensuring styles are applied accurately.
  • Combining them with CSS Grid enhances responsiveness and adaptability.

Here’s a practical example of combining attribute selectors with CSS Grid:

div[data-column="main"] {
grid-column: 1 / 3;
}

This code assigns elements with the data-column="main" attribute to the first two columns of the grid. Such techniques streamline your workflow and ensure consistent layouts.

Selector Use Case
a[href] Targets all anchor tags with a href attribute.
div[class=”example”] Styles divs with a specific class.
input[type=”text”] Targets text input fields.

By mastering attribute selectors, you can create precise, adaptable layouts that enhance user experience. These techniques are essential for modern web development, ensuring your designs are both functional and visually appealing.

CSS Tips for Improving Your Web Development Skills

Effective web development relies on mastering essential techniques that enhance both design and functionality. By focusing on practical strategies, you can create layouts that are visually appealing and perform seamlessly across all devices. These methods not only improve your workflow but also ensure a better user experience.
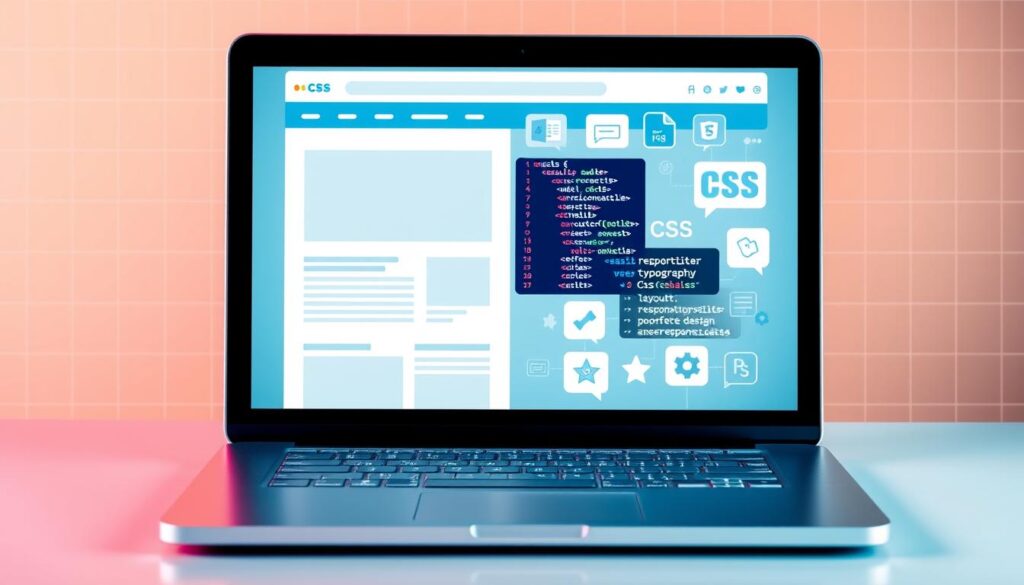
CSS tips for web design

Implementing Effective Layouts and Styles

Creating layouts that work consistently across different browsers is a cornerstone of modern web design. Start by using CSS Grid or Flexbox to structure your content. These tools provide flexibility and ensure your design adapts to various screen sizes.

For example, CSS Grid allows you to define columns and rows with ease. Here’s a simple way to create a responsive layout:

.container {
display: grid;
grid-template-columns: repeat(auto-fit, minmax(200px, 1fr));
gap: 20px;
}

This code ensures that your layout adjusts dynamically, providing a seamless experience for users on any device.

Optimizing CSS for Performance and Maintainability

Performance optimization is crucial for delivering fast-loading websites. Minify your CSS files to reduce their size and improve load times. Tools like PostCSS can automate this process, making it easier to maintain clean and efficient code.

Another strategy is to use CSS variables for consistent styling. This approach simplifies updates and ensures your design remains cohesive. For instance:

:root {
--primary-color: #3498db;
}

button {
background-color: var(--primary-color);
}

By defining colors and other properties as variables, you can make global changes with minimal effort.

Here’s a summary of key techniques for improving your web design skills:

Technique Benefit
CSS Grid Creates flexible and responsive layouts.
Minification Reduces file size for faster load times.
CSS Variables Simplifies theme management and updates.

By applying these strategies, you can elevate your development skills and create websites that stand out. Experiment with these techniques in your projects to see the impact firsthand.

Future-Proofing Your Code with Nesting and Clamp Functions

Staying ahead in web development means embracing innovative tools that streamline coding and enhance design flexibility. Two such features, nesting and the clamp() function, are set to revolutionize how developers approach styling and responsiveness. By adopting these techniques, you can write cleaner, more efficient code that adapts to future needs.

Organizing CSS with Nesting Features

Nesting allows developers to write more organized and readable stylesheets. Instead of repeating selectors, you can nest related rules within a parent selector. This experimental feature, currently available in Safari Technology Preview, simplifies your output and reduces redundancy.

Here’s an example of how nesting works:

.parent {
  color: #333;
  .child {
    font-size: 1.2em;
  }
}

This approach makes your code easier to maintain and understand. As browser support grows, nesting will become a standard practice for modern web development.

Responsive Typography with the Clamp Function

The clamp() function is a game-changer for creating fluid typography. It allows you to define a minimum, preferred, and maximum value for font sizes, ensuring your text scales smoothly across devices. This technique eliminates the need for media queries in many cases, improving your design workflow.

Here’s how you can use clamp() for responsive text:

h1 {
  font-size: clamp(1.5rem, 5vw, 3rem);
}

This code ensures the font size adjusts based on the viewport width, providing a seamless user experience. The clamp() function is supported in all modern browsers, making it a reliable tool for future-proofing your projects.

Here’s a summary of the benefits of these features:

Feature Benefit
Nesting Simplifies code organization and reduces redundancy.
clamp() Enables fluid typography without media queries.

By mastering these techniques, you can future-proof your code and stay ahead in the ever-evolving world of web development. Embrace these innovations to create cleaner, more adaptable designs that stand the test of time.

Leveraging Modern CSS for Interactive Content

Interactive content on web pages can be significantly enhanced with modern styling techniques. These methods not only improve visual appeal but also make navigation more intuitive for users. By incorporating effects like zoom-on-hover and smooth scrolling, you can create a more engaging experience.

Applying Zoom Effects on Hover

Zoom effects are a simple yet effective way to draw attention to images or other elements. When users hover over an item, it enlarges slightly, creating a dynamic interaction. This technique is particularly useful for portfolios, galleries, or product pages.

Here’s how you can implement a basic zoom effect:

.zoom-effect {
transition: transform 0.3s ease;
}

.zoom-effect:hover {
transform: scale(1.1);
}

This code ensures a smooth transition when the user hovers over the element. It’s a quick way to add interactivity without overwhelming the designer or the user.

Smooth Scrolling with Scroll Snapping

Scroll snapping is another modern technique that improves navigation. It ensures that the content aligns perfectly with the viewport as users scroll. This is especially useful for long pages or sections with multiple elements.

To enable scroll snapping, use the following code:

.scroll-container {
scroll-snap-type: y mandatory;
}

.scroll-item {
scroll-snap-align: start;
}

This setup ensures that each section snaps into place, providing a seamless browsing experience. It’s a great way to enhance usability on both desktop and mobile devices.

Here’s why these techniques matter:

  • They make web pages more interactive and engaging.
  • Zoom effects highlight key elements, improving user focus.
  • Scroll snapping ensures smooth navigation, enhancing the overall experience.

By mastering these techniques, you can create content that is both visually appealing and user-friendly. These methods are essential for modern designers looking to elevate their projects.

Conclusion

The journey of mastering web design is an ongoing process of learning and experimentation. Throughout this article, we’ve explored a variety of advanced techniques that can elevate your skills and streamline your workflow. From responsive layouts to dynamic animations, these strategies are designed to help you create visually stunning and functional websites.

One key takeaway is the importance of mastering fundamentals while embracing new features. Techniques like CSS Grid, custom cursors, and clipping paths offer endless possibilities for creativity. By experimenting with these tools, you can overcome common design challenges and deliver exceptional user experiences.

Another critical aspect is the value of staying updated with modern trends. As web development evolves, so do the tools and methods available. Continually updating your skills ensures that your projects remain relevant and competitive. For example, using fallback values and variables can significantly improve your workflow and design consistency.

Here’s a quick summary of the strategies discussed:

  • Leverage CSS Grid for responsive and flexible layouts.
  • Enhance interactivity with custom cursors and hover effects.
  • Use clipping and masking techniques for unique visuals.
  • Optimize performance with minification and variables.

As you continue to explore these techniques, remember that the margin for improvement is always present. Every project is an opportunity to refine your skills and push the boundaries of what’s possible. Embrace experimentation, and don’t hesitate to contribute to the broader web development community.

“The best way to predict the future is to create it.” – Peter Drucker

By mastering these advanced strategies, you can future-proof your skills and create designs that stand out. Take the next step in your journey—experiment, innovate, and share your knowledge with others. The world of web design is vast, and your contributions can make a lasting impact.

References and Further Learning

To deepen your understanding of advanced techniques, explore these curated resources for further learning. The GitHub repository “css tips tricks” offers practical insights into modern development practices. Additionally, the blog “18 Advanced CSS Tricks And Tips [2024]” provides detailed tutorials on creating dynamic designs, including gradient effects and responsive layouts.

For hands-on experience, check out video tutorials that demonstrate real-world applications of these concepts. Staying updated with evolving trends and browser capabilities is crucial for maintaining cutting-edge skills. Follow reputable channels and engage with the community to share knowledge and learn from others.

By leveraging these resources, you can enhance your expertise and contribute to the ever-evolving field of web development. Continuous learning ensures your projects remain innovative and impactful.
Introduction

The world of artificial intelligence (AI) and machine learning (ML) is always changing. DeepSeek R1 is a new platform that could change how we use AI and ML. This article will explore DeepSeek R1’s features, benefits, and uses. It’s perfect for both AI experts and newcomers.

What is DeepSeek R1?

DeepSeek R1 is a top-notch AI and ML platform. It helps with making, using, and managing AI models. It has tools for data prep, model training, and deployment. It’s easy to use and works well for any size organization.

Key Features of DeepSeek R1

  1. Comprehensive Data Preparation Tools: DeepSeek R1 has tools for cleaning, transforming, and adding to your data. This makes sure your data is ready for AI models.
  2. Advanced Model Training Capabilities: The platform supports many machine learning algorithms. It also has automated hyperparameter tuning to improve model performance.
  3. Seamless Deployment: DeepSeek R1 makes deploying models easy. It supports cloud, on-premises, and edge computing options.
  4. Real-Time Monitoring and Analytics: It has tools for tracking model performance in real-time. This helps you fix issues fast and keep models working well.
  5. Scalability and Flexibility: DeepSeek R1 grows with your needs. It’s flexible and can be customized for your projects.
  6. User-Friendly Interface: DeepSeek R1 is easy to use. Its interface is simple, making it accessible to all users.

The Benefits of Using DeepSeek R1

1. Accelerated AI Development

DeepSeek R1 speeds up AI development. It offers tools and features that let you focus on your models. This cuts down the time to complete AI projects.

2. Improved Model Performance

DeepSeek R1’s training tools, like automated hyperparameter tuning, boost model performance. This ensures your models work their best, no matter the task.

3. Enhanced Collaboration

DeepSeek R1 makes teamwork easier. It lets many users work together on projects. This leads to better ideas and faster solutions.

4. Cost-Effective Solution

DeepSeek R1 saves on development costs. It streamlines the AI process and only charges for what you use. This makes it affordable for any size organization.

5. Future-Proof Technology

DeepSeek R1 uses the latest AI and ML tech. Adopting it keeps your AI projects relevant and competitive.

Potential Applications of DeepSeek R1

DeepSeek R1 is versatile and can be used in many industries. Here are some examples:

1. Healthcare

In healthcare, DeepSeek R1 helps develop AI for diagnosing diseases and planning treatments. It can analyze medical images to spot problems. This helps doctors make more accurate diagnoses.

2. Finance

In finance, DeepSeek R1 aids in predicting market trends and spotting fraud. Its real-time tools are great for quick insights.

3. Retail

Retailers use DeepSeek R1 to improve customer service and manage inventory. It can suggest personalized products based on customer behavior.

4. Manufacturing

In manufacturing, DeepSeek R1 optimizes production and predicts equipment failures. Its flexibility makes it perfect for AI solutions in various operations.

5. Transportation

DeepSeek R1 helps in transportation by optimizing routes and predicting maintenance needs. It can analyze traffic to reduce delays.

Getting Started with DeepSeek R1

Ready to use DeepSeek R1 for your AI projects? Here’s how to get started:

1. Sign Up for DeepSeek R1

First, sign up on the DeepSeek website. Create an account to access all the tools and features.

2. Set Up Your Environment

Next, set up your development environment. Choose your programming languages and frameworks. DeepSeek R1 has guides and tutorials to help.

3. Prepare Your Data

Prepare your data before training models. DeepSeek R1 has tools for cleaning and transforming data. Make sure your data is ready.

4. Train Your Models

Now, train your models with your data. DeepSeek R1 supports many algorithms. It also has tools for improving model performance.

5. Deploy Your Models

Deploy your models after training. DeepSeek R1 supports cloud, on-premises, and edge computing. Choose the best option for you.

6. Monitor and Optimize

Monitor your models’ performance and optimize them. DeepSeek R1 has tools for real-time tracking. Use these to keep your models running well.

Case Studies: Real-World Success Stories with DeepSeek R1

Here are some success stories with DeepSeek R1:

1. Healthcare: Improving Diagnostic Accuracy

A leading healthcare provider used DeepSeek R1 to create an AI model. This model analyzes medical images to spot cancer early. Thanks to DeepSeek R1’s advanced tools, the provider’s accuracy improved a lot. This led to earlier cancer detection and better health outcomes for patients.

2. Finance: Detecting Fraudulent Transactions

A major financial institution used DeepSeek R1 to fight fraud. It built a model to catch fake transactions right away. DeepSeek R1’s tools helped the institution quickly find and stop fraud. This saved money and made customers trust them more.

3. Retail: Personalizing the Customer Experience

A global retailer used DeepSeek R1 to make shopping better for customers. It created a model that suggests products based on what customers like. With DeepSeek R1’s help, the retailer made shopping more enjoyable and boosted sales.

4. Manufacturing: Optimizing Production Processes

A leading manufacturer used DeepSeek R1 to make production better. It built a model to improve processes and predict when equipment might fail. DeepSeek R1’s flexibility helped the manufacturer use AI to work more efficiently and less downtime.

5. Transportation: Enhancing Route Planning

A transportation company used DeepSeek R1 to plan routes better. It created a model to avoid traffic jams. Thanks to DeepSeek R1, the company cut down on delays and made travel smoother.

The Future of DeepSeek R1

DeepSeek R1 is set to be a big player in AI and ML’s future. Here are some trends and developments to watch:

1. Increased Adoption Across Industries

More companies will use DeepSeek R1 as they see its value. Its ease of use makes it a great choice for those wanting to use AI.

2. Advancements in Model Training

DeepSeek R1 will keep getting better at training models. It will focus on making this process faster and more efficient. New tools and algorithms will help make high-quality models easier to create.

3. Enhanced Real-Time Monitoring and Analytics

DeepSeek R1 will improve its ability to give real-time insights. It will add new tools to help understand how models work and perform.

4. Integration with Emerging Technologies

DeepSeek R1 will work with new tech like edge computing and 5G. This will open up new chances for AI and ML, especially in areas like self-driving cars and smart cities.

5. Focus on Ethical AI

As AI grows, so does the need for ethical AI. DeepSeek R1 will focus on tools that ensure AI is fair and transparent. This will help build trust in AI solutions.

Conclusion

DeepSeek R1 is changing the game in AI and ML. It offers a wide range of tools and features. This makes it a powerful choice for companies wanting to boost their AI efforts.

It helps improve model performance and stay competitive. DeepSeek R1 can transform operations in many fields. This includes healthcare, finance, retail, manufacturing, and transportation.

As AI and ML evolve, DeepSeek R1 will be key. It helps you stay ahead and unlock new growth opportunities. By using DeepSeek R1, you can future-proof your AI projects.

Don’t wait any longer. Sign up for DeepSeek R1 today. It’s your first step towards revolutionizing your AI and ML projects. The future is here, and it’s powered by DeepSeek R1.

In the world of web development, using conditional styles is key. Material UI, a top React UI library, makes it easy to use conditional CSS. This lets developers create interfaces that change based on user needs and preferences. This article will show you how to use conditional CSS in Material UI, helping you make interfaces that adapt well.

Key Takeaways

  • Learn about conditional CSS and its benefits for Material UI components
  • Set up your Material UI environment and know the key components
  • See how to style Material UI components with CSS, including inline styles and Styled Components
  • Find out how to use theme variables and logic for dynamic styles
  • Discover how to make styles responsive and handle complex styles easily
  • Learn best practices for keeping your code readable, maintainable, and fast with conditional CSS in Material UI
  • See a real example of a custom button with conditional styling

Understanding Conditional CSS in Material UI

Exploring conditional CSS in Material UI opens up new possibilities. This part explains what conditional CSS is and its benefits for developers. It covers CSS-in-JS, dynamic styling, responsive design, and Material UI theming.

What is Conditional CSS?

Conditional CSS lets you apply styles based on certain conditions in your app. This makes it easy to create dynamic and responsive user interfaces. These interfaces can change based on user actions or device types.

Benefits of Using Conditional CSS

Using conditional CSS in Material UI has many advantages:

  • It makes styling components flexible based on their state or context
  • It improves maintainability by keeping styles separate from components
  • It boosts performance by only applying styles when needed
  • It works well with responsive design, allowing for styles specific to devices
  • It makes theming and customizing Material UI components easier

“Conditional CSS lets developers create dynamic and adaptive user experiences. The UI changes smartly based on user actions and device capabilities.”

Mastering conditional CSS in Material UI can take your web apps to the next level. You’ll deliver engaging, responsive, and personalized experiences for your users.

Setting Up Your Material UI Environment

To fully use Material UI in your React project, you need a solid base. Let’s go through the key steps to set up your Material UI environment. This will help you start using its powerful features.

Installing Material UI

To start, install the Material UI library. You can do this with npm, a popular JavaScript package manager. Open your terminal or command prompt and type:

npm install @material-ui/core

This command will install the core Material UI package, providing you with a vast array of pre-designed components and utilities to jumpstart your development process.

Importing Required Components

With Material UI installed, you can now begin importing the necessary components into your React application. Depending on your project’s specific requirements, you may need to import various components, such as buttons, forms, or layouts. Here’s an example of how you can import a few common Material UI components:

import { Button, TextField, Accordion } from '@material-ui/core';

By importing the desired components, you can start incorporating them into your React components and leverage their built-in styling and functionality.

Setting up your Material UI environment is the first step towards building visually appealing and responsive user interfaces. With the installation complete and the necessary components imported, you’re now ready to delve deeper into the world of conditional CSS and unleash the full power of Material UI in your React projects.

Basics of CSS Styling in Material UI

When working with Material UI, developers have a few options for applying CSS styles to their components. The two most common approaches are inline styles and styled components. Additionally, Material UI provides a powerful tool called the sx prop that allows for more granular control over conditional styling.

Inline Styles vs. Styled Components

Inline styles offer a straightforward way to apply styles directly to a component, allowing for dynamic and responsive styling. This approach can be useful for quickly applying small style changes or for handling state-dependent styles. However, inline styles can quickly become unwieldy as the complexity of the styling increases.

On the other hand, styled-components is a popular CSS-in-JS library that enables you to write actual CSS code and apply it to your components. This approach promotes better code organization, reusability, and maintainability. Styled components also provide more advanced features like theming and dynamic styling based on props.

Using the sx Prop

The sx prop in Material UI is a powerful tool for applying conditional styles to your components. It allows you to use a familiar CSS-like syntax directly within your React components, providing a more concise and readable way to manage styles. The sx prop is particularly useful when you need to apply styles based on component state, props, or other dynamic conditions.

By leveraging the sx prop, you can easily create responsive and adaptive designs that adjust to different screen sizes and device types. This approach can help you write more efficient and maintainable code, as you can encapsulate your styling logic within the component itself.

When choosing between inline styles, styled components, and the sx prop, consider the complexity of your styling needs, the level of control you require, and the overall maintainability of your codebase. Each approach has its own strengths and can be used in combination to create robust and visually appealing Material UI applications.

Creating Conditional Styles with Theme Variables

When working with Material UI, one of the most powerful features is the ability to leverage the theming system for conditional styling. By tapping into the rich set of theme properties, you can create dynamic and responsive user interfaces that adapt to various conditions or user preferences.

Utilizing Theme Properties

Material UI’s theming system provides a wide range of theme properties that you can access and utilize in your custom styles. These properties include palette, typography, spacing, and much more. By referencing these theme variables, you can write conditional CSS that responds to the current theme settings.

Overriding Default Styles Conditionally

Going beyond simply using theme variables, you can also override the default styles of Material UI components based on specific conditions. This allows you to create custom themes or apply style overrides that cater to your application’s unique requirements. Whether it’s adjusting the color scheme, typography, or any other aspect of the UI, the possibilities are endless when you combine conditional CSS with Material UI’s theming capabilities.

“Conditional styling with Material UI’s theme variables empowers you to build truly personalized user experiences that adapt to the user’s preferences and context.”

By mastering the art of creating conditional styles with theme variables, you can unlock a new level of flexibility and customization in your Material UI-powered applications. This powerful technique enables you to deliver consistent and visually appealing interfaces that cater to the diverse needs of your users.

Using Conditional Logic for Dynamic Styling

In the world of Material UI, the ability to apply dynamic styles based on component state or props is a powerful tool. By leveraging JavaScript conditionals and ternary operators, you can create truly customizable and responsive user interfaces. This section will explore how to implement these techniques to achieve flexible and visually engaging designs.

Implementing JS Conditional Statements

JavaScript conditional statements, such as if-else and switch statements, can be seamlessly integrated into your Material UI styling. This approach allows you to apply different styles based on specific conditions, such as the value of a prop or the state of a component. By using these conditional constructs, you can dynamically adjust the appearance of your Material UI components, making them adapt to the user’s needs or the application’s requirements.

Leveraging Ternary Operators

The ternary operator, a compact alternative to the if-else statement, can also be a valuable tool for creating dynamic styles in Material UI. This concise syntax enables you to make quick decisions about which styles to apply, without the need for lengthy conditional blocks. By using the ternary operator, you can easily toggle between different styles based on a single condition, resulting in a more readable and maintainable codebase.

When combined with Material UI’s powerful styling capabilities, these JavaScript conditional techniques open up a world of possibilities for crafting dynamic, user-centric interfaces. By leveraging JavaScript conditionals, ternary operators, and the flexibility of dynamic CSS, you can create React conditional rendering scenarios that truly set your Material UI applications apart.

Responsive Styles with Conditional CSS

In the world of web development, where screens come in all shapes and sizes, crafting responsive designs is paramount. Material UI, a popular React UI framework, offers a powerful solution to this challenge through the use of conditional CSS. By leveraging breakpoints and defining responsive styles, developers can ensure their components seamlessly adapt to various devices and screen resolutions.

Introducing Breakpoints

Breakpoints are the foundation of responsive design in Material UI. These pre-defined screen size thresholds allow developers to apply specific styles based on the user’s device. Material UI provides a comprehensive set of breakpoints that cater to a wide range of screen sizes, from extra-small (xs) to extra-large (xl).

Defining Responsive Styles

With the help of breakpoints, you can create responsive styles that adjust your components based on the user’s device. This mobile-first approach ensures your designs look and function optimally, regardless of the screen size. By utilizing media queries, you can define specific styles for each breakpoint, ensuring your content and layout adapt seamlessly.

For instance, you might want to adjust the font size, padding, or even the layout of a button component based on the user’s device. With conditional CSS in Material UI, you can easily achieve this by targeting the appropriate breakpoints and applying the necessary styles.

By mastering the use of breakpoints and responsive styles, you can create web applications that deliver a consistent and enjoyable user experience across a diverse range of devices, from smartphones to desktops. This responsive design approach is essential for meeting the ever-evolving needs of modern web users.

Combining Multiple Conditions for Advanced Styles

material ui components

In the world of Material UI, where style and functionality converge, the ability to combine multiple conditions for advanced styling is a true superpower. By leveraging logical operators and managing complex style arrays, developers can craft sophisticated and flexible component designs that adapt seamlessly to varying user scenarios.

Utilizing Logical Operators

Logical operators, such as and, or, and not, are the building blocks of complex conditionals. These operators allow developers to create intricate style rules that respond to a combination of factors, ensuring that components maintain their visual integrity and user-friendliness across a wide range of use cases.

For instance, you might want to apply a specific style to a button component when it’s both disabled and hovered over. By using the and operator, you can easily achieve this level of granular control, empowering your components to adapt seamlessly to the user’s interactions.

Managing Complex Styles with Arrays

Mastering the art of working with style arrays is a crucial skill for any Material UI enthusiast. When dealing with advanced conditional styling, arrays provide a flexible and organized way to manage complex CSS-in-JS configurations.

  • Arrays allow you to group related style rules together, making your codebase more readable and maintainable.
  • By leveraging conditional logic within your style arrays, you can create intricate visual representations that adjust based on a component’s state or user interactions.
  • This approach encourages modular and reusable styling, as you can easily apply the same array-based conditional logic across multiple components or contexts.

Combining the power of logical operators and style arrays enables you to unlock the full potential of advanced conditional styling in Material UI. With these techniques, you can craft components that not only look stunning but also adapt gracefully to the diverse needs of your application’s users.

Example: Conditional Styling in a Button Component

Crafting custom Material UI components with dynamic styling is a powerful way to enhance the consistency and flexibility of your user interface. In this section, we’ll explore a practical example of creating a reusable button component that applies different styles based on the props it receives.

Creating a Custom Button

Let’s start by defining a custom button component that builds upon the foundation of Material UI’s core Button component. This will allow us to leverage the robust features and styling capabilities provided by Material UI, while also introducing our own custom prop-based styling logic.

To create the custom button, we’ll use the styled function from Material UI’s @material-ui/core/styles package. This will enable us to define the base styles for the button, as well as the conditional styles we want to apply based on the component’s props.

Applying Conditional Styles Based on Props

One of the key benefits of using conditional CSS in Material UI components is the ability to adapt the UI based on specific conditions or user interactions. In our custom button component, we can leverage this capability to apply different styles based on the props passed to the component.

For example, we might want to change the button’s color, size, or other visual attributes based on whether the button is the primary action, a secondary action, or disabled. By using conditional CSS, we can ensure that our button component maintains a consistent and visually engaging appearance across different use cases.

Prop Description Conditional Styles
variant Determines the button’s appearance (e.g., “contained”, “outlined”, “text”) Applies different background colors, border styles, and text colors based on the variant
color Specifies the button’s color (e.g., “primary”, “secondary”, “default”) Adjusts the button’s color scheme based on the selected color
size Sets the button’s size (e.g., “small”, “medium”, “large”) Scales the button’s padding, font size, and other dimensions accordingly
disabled Determines whether the button is disabled or not Applies a muted color scheme and reduces the button’s opacity when disabled

By leveraging conditional CSS in our custom Material UI button component, we can create a highly reusable, consistent, and versatile UI element that adapts to the needs of our application, enhancing the overall user experience.

Best Practices for Conditional CSS in Material UI

As you navigate the world of conditional CSS within Material UI, it’s essential to keep a few best practices in mind. These guidelines will help you maintain code readability, enhance maintainability, and optimize performance in your React applications.

Maintaining Readability and Maintainability

When working with conditional styles, it’s crucial to keep your codebase organized and easy to understand. Utilize meaningful variable names that clearly convey the purpose of your styles, and group related styles together for better organization. This approach will make it simpler for your team to collaborate and make future updates to the codebase.

Additionally, consider breaking down complex conditional logic into smaller, more manageable functions or components. This will improve the overall readability and maintainability of your code, making it easier to debug and scale as your application grows.

Performance Considerations

While conditional CSS can be a powerful tool, it’s important to be mindful of its impact on performance. Avoid excessive conditional checks or complex style calculations, as these can lead to unnecessary re-renders and potentially slow down your application. Instead, focus on optimizing your conditional styles to minimize the impact on your application’s performance.

One strategy is to leverage Material UI’s built-in responsive design capabilities, using breakpoints and media queries to conditionally apply styles based on the user’s device or screen size. This approach can help ensure your application remains fast and responsive, even with dynamic styling.

FAQ

What is conditional CSS in Material UI?

Conditional CSS in Material UI refers to the ability to apply different styles to components based on specific conditions, such as component props or state. This allows for the creation of dynamic and responsive user interfaces in React applications.

What are the benefits of using conditional CSS in Material UI?

The key benefits of using conditional CSS in Material UI include improved flexibility, maintainability, and performance. Conditional styling enables you to create components that adapt to different scenarios, enhancing the overall user experience and making your codebase more scalable.

How do I set up a Material UI environment for conditional styling?

To set up a Material UI environment for conditional styling, you’ll need to install the Material UI package, import the required components, and familiarize yourself with the available styling options, such as inline styles, styled components, and the `sx` prop.

What are the different approaches to CSS styling in Material UI?

Material UI provides several approaches to CSS styling, including inline styles, styled components, and the `sx` prop. Each method has its own benefits and trade-offs, and the choice often depends on the complexity of your styling requirements and personal preferences.

How can I use theme variables for conditional styling in Material UI?

Material UI’s theming system allows you to leverage theme properties for conditional styling. By utilizing theme variables, you can override default styles based on specific conditions or user preferences, ensuring a cohesive and customizable user interface.

Can I use JavaScript conditional logic for dynamic styling in Material UI?

Yes, you can use JavaScript conditional statements and ternary operators to apply styles dynamically based on component states or props. This approach provides a flexible way to create adaptive and responsive designs in Material UI.

How can I create responsive styles with conditional CSS in Material UI?

Material UI’s breakpoint system allows you to define responsive styles using conditional CSS. By leveraging breakpoints, you can create styles that adapt to different screen sizes and devices, ensuring your application looks and functions consistently across various platforms.

How can I combine multiple conditions for advanced styling in Material UI?

For more complex styling requirements, you can combine multiple conditions using logical operators and manage advanced styles with arrays. This approach enables you to create sophisticated and flexible component designs that adapt to a wide range of scenarios.

Can I create custom Material UI components with conditional styles?

Yes, you can create custom Material UI components and apply conditional styles based on component props. This allows you to build reusable and adaptable UI elements that maintain consistent styling across your application.

What are some best practices for using conditional CSS in Material UI?

Some best practices for using conditional CSS in Material UI include maintaining code readability and maintainability, optimizing performance, and following Material Design guidelines to ensure a cohesive and accessible user experience.

In today’s digital landscape, having a visually appealing and user-friendly website is essential for businesses to thrive. Effective web design goes beyond just aesthetics – it’s about crafting an online presence that captivates your audience and drives meaningful conversions. Whether you’re launching a new website or revamping an existing one, understanding the principles of web design can be the key to your online success.

In this article, we’ll explore the core elements of web design and uncover strategies to create a stunning website that not only looks great but also delivers an exceptional user experience. From understanding the importance of web design to delving into the latest trends and best practices, this comprehensive guide will equip you with the knowledge and insights to build a website that truly stands out in the digital realm.

Key Takeaways

  • Effective web design is crucial for businesses to establish a strong online presence and drive conversions.
  • Understanding the fundamentals of web design, including layout, typography, and color, is essential for creating a visually appealing and user-friendly website.
  • Responsive design and mobile optimization are crucial for delivering a seamless experience across all devices.
  • Incorporating engaging content and multimedia elements can enhance the overall user experience and keep visitors captivated.
  • Adhering to SEO best practices in web design can significantly improve the visibility and ranking of your website on search engine results pages.

Understanding the Importance of Web Design

In the digital age, web design has become a crucial aspect of any successful online presence. It’s the foundation upon which businesses, organizations, and individuals can establish their brand, communicate their message, and engage with their audience. But what exactly is web design, and why does it matter?

What is Web Design?

Web design encompasses the process of planning, creating, and arranging the visual elements of a website. It involves the website layout, visual hierarchy, and typography – all working together to create an intuitive and visually appealing user experience.

Why Web Design Matters

Effective web design is not just about aesthetics; it plays a vital role in the success of a website. A well-designed website can improve user engagement, increase conversions, and enhance a brand’s overall online presence. On the other hand, a poorly designed website can lead to high bounce rates, frustrate users, and ultimately hurt a business’s reputation.

Key Elements of Effective Web Design

  • Layout: The arrangement and organization of content, ensuring a clean and user-friendly structure.
  • Visual Hierarchy: The strategic placement of visual elements to guide the user’s attention and highlight the most important information.
  • Typography: The selection and use of fonts, sizes, and styles to enhance readability and create a cohesive brand identity.

By mastering these key elements, web designers can create websites that not only look visually appealing but also provide a seamless and engaging user experience, ultimately driving business success in the digital landscape.

How to Choose the Right Web Design Platform

Selecting the appropriate web design platform is a crucial step in creating a successful online presence. Web designers and front-end developers must navigate the diverse array of options, each with its unique features and capabilities. By understanding the key factors to consider, businesses can make an informed decision that aligns with their specific needs and budget.

The web design landscape is dominated by several leading platforms, each with its own strengths and weaknesses. WordPress, Squarespace, and Wix are among the most widely used options, offering a range of customization tools, ecommerce functionalities, and content management capabilities. Understanding the nuances of these platforms is essential in selecting the right fit for your web design project.

Factors to Consider

  • Ease of use: How intuitive and user-friendly is the platform for both developers and end-users?
  • Customization: Can the platform be tailored to match your brand’s visual identity and functional requirements?
  • Ecommerce integration: If you plan to sell products or services online, ensure the platform supports robust ecommerce features.
  • SEO and performance: Look for platforms that prioritize search engine optimization and deliver fast, responsive user experiences.
  • Scalability: Consider the platform’s ability to grow and accommodate your business’s changing needs over time.

Budgeting for Your Web Design

Determining the appropriate budget for your web design project is a critical step. Factors such as the complexity of the design, the level of customization required, and the need for ongoing maintenance and updates can all impact the overall cost. By carefully evaluating your requirements and exploring the pricing models of various platforms, you can ensure that your web design investment aligns with your business goals and financial considerations.

Platform Pricing Range Typical Use Cases
WordPress $0 – $30,000+ Blogs, small business websites, ecommerce stores
Squarespace $12 – $40 per month Personal websites, portfolios, small businesses
Wix $13 – $49 per month Small businesses, personal websites, online stores

By carefully considering the available web design platforms, evaluating key factors, and aligning your budget with your project requirements, you can embark on the journey of crafting a stunning and functional website that resonates with your target audience.

Crafting a User-Friendly Experience

Web Design: Create a Stunning Website That Converts

In the realm of web design, the user experience is paramount. A well-designed website not only captivates visitors but also ensures they can navigate and interact with ease. By focusing on usability and intuitive navigation, web designers can create an engaging online presence that keeps users coming back.

Importance of Usability

Usability is the cornerstone of a successful website. When users can easily find what they’re looking for and complete their desired actions, it fosters a positive user experience. Ultimately, a user-friendly website leads to higher engagement, increased conversions, and stronger brand loyalty.

Tips for Intuitive Navigation

Crafting an intuitive website layout is crucial for guiding users through your site. Consider the following tips to enhance navigation:

  • Organize content logically, with clear and concise menu structures.
  • Utilize visual cues, such as icons and signposting, to help users orient themselves.
  • Ensure seamless transitions between pages, allowing users to flow effortlessly.
  • Implement responsive design, ensuring a consistent experience across devices.
  • Continuously gather user feedback and iterate on the design based on their needs.

By prioritizing usability and intuitive navigation, web designers can create a user experience that captivates and engages visitors, ultimately driving higher engagement and conversions.

The Role of Color in Web Design

In the realm of web design, color holds immense power. It has the ability to evoke emotions, shape perceptions, and guide the user’s experience. Understanding the color theory and its impact on visual hierarchy is crucial for crafting a captivating and effective website.

Color Psychology

Colors can significantly influence the mood and behavior of your website visitors. Different hues have been shown to elicit specific psychological responses. For instance, blues and greens can create a sense of calmness and trust, while reds and oranges can evoke feelings of excitement and energy. Leveraging this color psychology can be a powerful tool in web design, allowing you to guide users’ emotions and decision-making processes.

Choosing the Right Palette

  • Establish a cohesive color scheme that aligns with your brand identity and messaging.
  • Carefully balance the use of primary, secondary, and neutral colors to create visual interest and hierarchy.
  • Ensure that your color choices complement each other and provide sufficient contrast for readability.
  • Experiment with different color combinations and monitor user feedback to refine your palette over time.

Accessibility Considerations

When designing with color, it’s essential to consider the accessibility needs of your users. Individuals with color vision deficiencies, such as colorblindness, may struggle to distinguish between certain hues. To ensure an inclusive experience, adhere to web accessibility guidelines by:

  1. Providing sufficient color contrast between text and background elements.
  2. Avoiding the use of color as the sole means of conveying information.
  3. Offering alternative text descriptions for color-coded imagery or graphics.
  4. Conducting regular accessibility testing and making necessary adjustments.

By understanding the color theory, considering visual hierarchy, and prioritizing accessibility, you can craft a compelling and inclusive web design that captivates your audience and drives conversions.

The Impact of Mobile Responsiveness

Web Design: Create a Stunning Website That Converts

In today’s digital landscape, the importance of mobile-friendly web design cannot be overstated. As more and more users access the internet on their smartphones and tablets, having a responsive website has become a must-have for businesses and organizations of all sizes.

Why Mobile-Friendly Is a Must

With the rise of mobile devices, the user experience on smaller screens has become a critical factor in the success of any website. Responsive design ensures that your content is optimized for seamless viewing and interaction across a variety of devices, enhancing the user experience and keeping your audience engaged.

Designing for Different Screen Sizes

  • Understand the diverse range of screen sizes and resolutions used by your target audience.
  • Adopt a mobile-first approach, designing your website to provide an optimal experience on smaller screens first, then scaling up for larger displays.
  • Utilize flexible grid systems, fluid images, and media queries to ensure your content adapts fluidly to different viewport sizes.
  • Prioritize simple, intuitive navigation and streamlined content hierarchy to enhance usability on mobile devices.

By embracing the principles of responsive design and optimizing your website for mobile users, you can unlock a world of opportunities, reaching a wider audience and delivering a consistently exceptional user experience across all devices.

Creating Engaging Content

Crafting captivating web content is a crucial element of effective web design. By blending compelling copy with visually striking multimedia elements, you can captivate your audience and leave a lasting impression. In this section, we’ll explore the art of writing persuasive copy and integrating multimedia to elevate your website’s user experience.

Writing Compelling Copy

The power of words cannot be underestimated in web design. Your website’s typography and the way you structure your visual hierarchy play a vital role in engaging visitors. Craft copy that is concise, informative, and tailored to your target audience. Incorporate clear calls-to-action, and ensure your messaging aligns with your brand’s unique voice and personality.

Integrating Multimedia Elements

Complementing your captivating copy with visually striking multimedia elements can elevate your website’s overall appeal and effectiveness. Strategically incorporate high-quality images, videos, infographics, and interactive features to enhance the user experience and convey your message in a more engaging way. By striking the right balance between text and multimedia, you can create a harmonious and captivating web presence.

Multimedia Element Benefits
Images Capture attention, illustrate concepts, and reinforce branding.
Videos Provide engaging, dynamic content and explain complex ideas effectively.
Infographics Visually communicate data and statistics in a compelling way.
Interactive Features Encourage user engagement and foster a memorable user experience.

“Great web design without functionality is like a sports car with no engine.”
– Paul Cookson

By crafting compelling copy and strategically integrating multimedia elements, you can create a web presence that captivates your audience and drives meaningful engagement. Remember, the key to success lies in striking the right balance between the written word and visual storytelling.

SEO Best Practices for Web Design

As a web designer, understanding the importance of search engine optimization (SEO) is crucial for creating websites that not only look great but also perform well in online search results. By integrating effective SEO strategies into the web design process, you can ensure your client’s website is easily found by their target audience.

Importance of SEO in Web Design

Search engine optimization is the foundation for driving organic traffic to a website. By optimizing various elements of the web design, such as page structure, content, and user experience, you can improve the website’s visibility and ranking in search engine results. This, in turn, leads to more qualified leads and potential customers for your client’s business.

Optimizing Page Speed

In the world of web design, page speed is a critical factor that can make or break a user’s experience. Search engines, like Google, also prioritize fast-loading websites in their rankings. By optimizing image sizes, reducing server response times, and minimizing the use of heavy media elements, you can ensure your client’s website loads quickly and efficiently, improving both user experience and SEO performance.

Using Keywords Effectively

Incorporating the right keywords into the web design is essential for helping search engines understand the content and context of the website. When crafting page titles, meta descriptions, headings, and body text, be sure to strategically include the relevant web design and front-end development keywords that your target audience is searching for. This will boost the website’s relevance and increase its chances of appearing in the top search results.

By implementing these SEO best practices in your web design process, you can create websites that not only look visually stunning but also perform exceptionally well in online search, driving more traffic and conversions for your clients.

Showcase Your Brand with Effective Design

In the dynamic world of web design, crafting a visually compelling and brand-aligned website is crucial for connecting with your audience. By aligning your design choices with your brand’s identity, you can create a lasting impression and effectively communicate your company’s values, personality, and unique offering.

Aligning Design with Brand Identity

The key to successful branding on your website lies in the seamless integration of visual hierarchy and color theory. Carefully curating a consistent color palette, typography, and imagery that reflect your brand’s essence can instantly establish a strong emotional connection with your visitors. This holistic approach ensures that your website serves as a powerful extension of your brand, leaving a lasting impact on your audience.

Examples of Great Branding in Web Design

Consider the website of Apple Inc., a shining example of how effective web design can elevate a brand. The clean, minimalist layout, paired with the iconic Apple logo and signature color scheme, immediately conveys the brand’s dedication to innovation and user-centric design. Similarly, the website of Airbnb effectively incorporates their whimsical brand personality through playful illustrations and a warm, inviting color palette.

Brand Web Design Highlight Key Takeaway
Apple Inc. Clean, minimalist layout with consistent branding elements Seamlessly aligns website design with brand identity
Airbnb Playful illustrations and warm color palette Effectively communicates brand personality through design

By taking inspiration from these exemplary brands, you can leverage the power of web design to showcase your unique brand identity and captivate your target audience.

Testing and Launching Your Website

Crafting a visually stunning and user-friendly website is just the beginning. Before you can unveil your masterpiece to the world, it’s essential to thoroughly test and prepare for the launch. This crucial phase ensures your website is ready to deliver an exceptional experience for your visitors.

Key Considerations for Testing

Effective website testing involves a multifaceted approach. Start with usability testing to assess how intuitive and seamless the user experience is. Recruit a diverse group of beta testers to navigate through the website and provide valuable feedback. Additionally, conduct cross-browser compatibility tests to ensure your website functions flawlessly across various browsers and devices.

Don’t forget to put your wireframing and prototyping efforts to the test. Verify that the website’s structure, navigation, and content flow align with your initial design vision. Address any discrepancies or areas for improvement before the big launch.

Launch Checklist

When you’re confident your website is ready, it’s time to prepare for the exciting launch. Refer to this comprehensive checklist to ensure a smooth and successful rollout:

  1. Finalize all content and media assets
  2. Optimize website performance and speed
  3. Conduct final tests for functionality and usability
  4. Implement necessary security measures
  5. Establish clear analytics tracking and reporting
  6. Develop a marketing and promotion strategy
  7. Notify key stakeholders and audiences
  8. Monitor and address any post-launch issues

By meticulously testing and following a well-organized launch plan, you can ensure your website’s debut is a resounding success. With the right preparation, your digital masterpiece will captivate your audience and set the stage for long-term growth and engagement.

Maintaining and Updating Your Website

Launching a visually stunning and user-friendly website is just the beginning of your web design journey. To ensure your online presence remains relevant, engaging, and secure, regular maintenance and updates are crucial. This final section will explore the importance of keeping your website fresh and the best practices for ongoing website management.

Importance of Regular Updates

In the ever-evolving digital landscape, web design standards, user expectations, and technology are constantly changing. Regularly updating your website not only helps it stay current but also ensures it continues to provide an optimal experience for your visitors. Keeping your website content, design, and functionality up-to-date is essential for maintaining your brand’s credibility, improving search engine visibility, and fostering a positive user experience.

Best Practices for Ongoing Maintenance

Effective website maintenance involves a multi-faceted approach. Begin by regularly reviewing your website’s content, ensuring all information is accurate, relevant, and aligned with your brand’s messaging. Implement a content management system (CMS) like WordPress or Drupal to streamline the update process and empower your team to make changes with ease. Stay vigilant in updating your website’s security measures, such as software and plugin versions, to protect against potential vulnerabilities.

Additionally, monitor your website’s performance metrics, such as page load times, bounce rates, and user engagement, to identify areas for improvement. Leverage tools like Google Analytics to gain valuable insights and make data-driven decisions about enhancing the user experience. By staying proactive in your website maintenance, you can ensure your online presence continues to captivate and serve your audience effectively.

FAQ

What is web design?

Web design is the process of creating and designing the visual appearance, layout, and functionality of a website. It involves elements such as color, typography, imagery, and user experience to make a website visually appealing and easy to navigate.

Why is web design important?

Web design is crucial because it directly impacts the user experience and can make or break the success of a website. A well-designed website not only looks visually stunning but also enhances usability, improves brand perception, and ultimately drives more conversions and engagement.

What are the key elements of effective web design?

The key elements of effective web design include layout, visual hierarchy, typography, color theory, responsive design, and user experience. These elements work together to create a cohesive and engaging website that captures the attention of visitors and encourages them to take desired actions.

How do I choose the right web design platform?

When choosing a web design platform, consider factors such as ease of use, customization options, e-commerce capabilities, and budget. Popular platforms like WordPress, Squarespace, and Wix offer different features and levels of complexity, so it’s important to evaluate your needs and select the one that best fits your requirements.

What are the best practices for creating a user-friendly website?

Some best practices for creating a user-friendly website include: Prioritizing intuitive navigation, ensuring responsive and mobile-friendly design, optimizing for page speed, and crafting compelling content that engages and informs your target audience.

How can I leverage color in web design?

Color plays a crucial role in web design. By understanding color psychology and choosing a harmonious color palette, you can evoke specific emotions, enhance the brand identity, and ensure accessibility for users with visual impairments. Carefully consider the impact of color on your website’s overall aesthetic and user experience.

Why is mobile responsiveness important in web design?

Mobile responsiveness is essential in web design because a growing number of users access websites from their smartphones and tablets. A mobile-friendly website ensures a seamless and consistent user experience across different devices, which is crucial for engagement, conversions, and SEO.

How can I create engaging web content?

To create engaging web content, focus on writing compelling copy, integrating relevant multimedia elements, and leveraging principles of visual hierarchy and typography. Combining informative and visually appealing content can captivate your audience and keep them engaged with your website.

What are the SEO best practices for web design?

Implementing SEO best practices in web design involves optimizing page speed, using keywords effectively, and ensuring a clean and organized website structure. This helps search engines understand and index your website, ultimately improving its visibility and driving more organic traffic.

How can I effectively showcase my brand through web design?

Effective web design can be a powerful tool for showcasing your brand identity. By aligning design elements like color, typography, and imagery with your brand’s personality and values, you can create a cohesive and visually distinctive online presence that resonates with your target audience.

What are the key considerations for testing and launching a website?

Before launching a website, it’s important to thoroughly test it for usability, functionality, and cross-browser compatibility. This includes conducting user testing, checking for broken links, and ensuring a smooth user experience. Additionally, create a comprehensive launch checklist to ensure a successful website debut.

Why is ongoing website maintenance important?

Maintaining and regularly updating your website is essential to keep it secure, up-to-date, and aligned with evolving web standards and user expectations. This includes tasks like software updates, content refreshes, and performance optimization to ensure your website continues to provide an excellent user experience over time.

The need for sleek, modern web designs is growing fast. CSS Material is here to help. It lets designers and developers make stunning, easy-to-use websites and apps. It’s based on Material Design, offering tools and components for beautiful, functional web experiences.

CSS Material combines Material Design’s key elements like typography, colors, and grid layouts. This makes it easy to bring Material Design to your web projects. Your users will get a smooth, consistent experience everywhere.

css material

Key Takeaways

  • CSS Material is a robust framework for creating modern, visually-appealing web interfaces
  • It is based on the principles of Material Design, a widely-adopted design language
  • CSS Material provides a comprehensive set of tools and components to streamline the development process
  • Designers and developers can leverage CSS Material to craft consistent, user-friendly web experiences
  • The framework offers responsive grid layouts, typography scaling, and color system management

Understanding CSS Material Design Fundamentals

Modern web design focuses on making websites both beautiful and easy to use. CSS Material Design, created by Google, provides a detailed guide for this. It helps designers use visual hierarchy and design components to make digital experiences better.

Core Principles of Material Design

Material Design is built on key principles like simplicity, responsiveness, and consistency. These include:

  • Tactile Surface: Using material qualities for a real and natural feel.
  • Bold Imagery: Using strong visuals and typography to grab attention and share info.
  • Fluid Motion: Adding smooth animations and transitions for a better look and feel.
  • Adaptive Layouts: Creating layouts that work well on all screens and devices.

Visual Language and Hierarchy

The visual language of Material Design is clean and structured. It uses material design principles for a unified and easy-to-use interface. This includes strategic element placement, clear typography, and colors that fit the overall look.

Material Design Components

Material Design has a wide range of pre-made design components. These include buttons, menus, cards, and dialogs. Using these elements helps designers make websites faster and keep them consistent.

By grasping Material Design’s basics, designers can make amazing digital experiences. These experiences engage and captivate their audience.

Getting Started with CSS Material Frameworks

CSS Material frameworks can change how you design websites. They are key for making modern, beautiful sites. Whether you’re new or experienced, learning these tools is essential.

Google’s Material-UI is a top CSS framework for Material Design. It has many pre-built components for fast, accessible UIs. Just follow the setup guide to start using it in your projects.

Vuetify is another great CSS framework. It mixes Vue.js with Material Design’s look. It has lots of customizable parts, perfect for Vue.js users.

  1. Choose the right CSS framework for your project. Think about compatibility, support, and needed features.
  2. Check the setup guide for your chosen framework. It helps with a smooth Material Design implementation.
  3. Learn about Material Design’s core principles. This will help with your design and component choices.
  4. Look at the framework’s components and customization options. This lets you make a unique user experience.
CSS Framework Key Features Popularity
Material-UI Extensive component library, robust theming, accessibility support High
Vuetify Integrates seamlessly with Vue.js, comprehensive documentation, active community Medium to High
Angular Material Optimized for Angular ecosystem, comprehensive UI components, accessibility focused High

“Embracing CSS Material frameworks is a game-changer for web developers, allowing them to create visually stunning and highly functional user interfaces with ease.”

Using CSS Material frameworks speeds up your work. It ensures your designs are consistent and user-friendly. With the right knowledge, you’ll excel in modern web design.

Key Features of Material Design Systems

Material Design is a visual language by Google. It has features for making modern, responsive, and attractive web experiences. It focuses on three main parts for great user experiences.

Responsive Grid Layouts

Material Design stresses responsive design. It makes sure content and interfaces work well on many devices. Its grid layout is flexible and scalable, helping designers create user-friendly interfaces for all devices.

Typography and Scaling

Typography is key in Material Design. It aims for legible and beautiful text. The system has guidelines for fonts, sizes, and scaling. This ensures text is easy to read and looks good across designs.

Color Systems and Palettes

Material Design’s color palettes are a big part of its look. These color systems give designers a range of colors. They help create striking and unified Material Design features that grab users’ attention and build a strong brand.

Material Design’s core principles of responsive design, typography, and color help designers and developers. They make experiences that look good and work well.

Material Design is a top choice for web development. It helps create beautiful and easy-to-use interfaces. Many Material Design libraries and CSS frameworks have come out to make it easier to use. Let’s look at some popular Material Design CSS libraries and what they offer.

Material-UI

Material-UI is a free CSS framework for React. It has lots of customizable components. You can find everything from buttons to data tables, making it great for modern web apps.

Vuetify

Vuetify is a Material Design component framework for Vue.js. It has a lot of pre-built components and a responsive grid system. It’s known for its performance and ease of use for Vue.js developers.

Ionic Framework

Ionic Framework is a big open-source UI toolkit with a Material Design theme. It’s mainly for mobile and desktop apps, but its Material Design parts work for web projects too.

Library Framework Pros Cons
Material-UI React
  • Comprehensive component library
  • Highly customizable
  • Strong community and documentation
  • Steep learning curve for beginners
  • Dependency on React
Vuetify Vue.js
  • Seamless integration with Vue.js
  • Responsive and accessible components
  • Extensive documentation and community support
  • Limited to Vue.js projects
  • Potential performance issues with larger applications
Ionic Framework Cross-platform
  • Supports multiple frameworks (React, Angular, Vue.js)
  • Optimized for mobile development
  • Material Design-inspired UI components
  • May be overkill for purely web-based projects
  • Steeper learning curve for web-only developers

There are many Material Design libraries and CSS frameworks out there. Choose the one that matches your project, development stack, and preferences.

Implementation Strategies for Material Design

Using Material Design in your web projects can make a big difference. It offers a modern look and a great user experience. To get the most out of it, you need to know the best ways to use it. Let’s explore the key steps to make Material Design work well in your web projects.

Setup and Installation Guide

The first thing to do is set up the framework and get the needed tools. You’ll likely use a CSS library like Google’s Material Design Lite or Material-UI. The setup might change based on your project and the library you pick. But, most libraries have easy-to-follow guides to help you.

Basic Configuration Steps

Once you have the framework, you need to set up the basics of Material Design. This includes picking your colors, fonts, and other visual details. Many libraries let you customize these to fit your brand. Knowing how to use these options is important for a smooth integration.

Common Implementation Patterns

  • Responsive Grid Layouts: Material Design uses a grid system for different screen sizes. This helps make your interface look good on any device.
  • Material Components: Use pre-made components like buttons and cards to make your app look consistent and save time.
  • Animation and Transitions: Adding smooth animations makes your app more engaging and follows Material Design’s rules on motion.

By using these strategies, you can make your web projects look great and work well. This will make your users happy and keep them coming back.

“Material Design is a cohesive and comprehensive design language that provides a clear framework for building high-quality digital experiences.”

CSS Material Components and Elements

The CSS Material Design framework is great for modern web projects. It has a wide range of UI components and elements. These are designed for easy use, consistent look, and work well on all devices.

Let’s look at some key Material Design components and how to use them with CSS:

  • Buttons – Material Design has many button styles, like raised and flat. Each has its own CSS classes for customization.
  • Cards – Cards are key in Material Design. They hold content, images, and actions. The CSS for cards includes elevation and hover effects.
  • Navigation Menus – Material Design menus, like top bars and drawers, keep your site organized. They have CSS for alignment and interactive states.
  • Form Controls – Material Design form controls, like text fields and switches, have unique styles. They make the user experience better.

Using Material Design components and CSS styles helps create great interfaces. It’s important for making modern, responsive web apps.

Material Design components

“Material Design components provide a consistent and polished user experience, allowing developers to focus on building functional and engaging web applications.”

Exploring CSS Material Design opens up many resources and best practices. These help you use UI elements well in your projects. Embracing Material Design improves your web app’s look and feel.

Responsive Design with Material CSS

In today’s digital world, making websites that work well on all devices is key. Material CSS helps designers make websites that look great on any screen size. It’s all about creating websites that are easy to use on phones, tablets, and computers.

Breakpoint Management

Material CSS makes it easy to change how a website looks on different screens. Designers can set up special points where the layout changes. This way, websites look good on any device, from big computers to small phones.

Fluid Typography

Material CSS is known for its fluid typography. This means text looks right on any screen size. It uses smart font sizes and units to make sure text is easy to read on all devices.

Mobile-First Approach

  • Material CSS promotes a mobile-first design. Designers start by making websites work well on small screens.
  • This method makes sure the main content is easy to use on any device.
  • Then, designers add more features for bigger screens, using Material CSS’s flexibility.

Material CSS helps designers make websites that are easy to use on all devices. It uses responsive web design, mobile-first development, and fluid typography. This way, websites are fun and work well for everyone.

Material Design Animation and Transitions

Material Design makes your web designs come alive with CSS animations and smooth transitions. It sees motion as key, guiding the user and making the experience smooth and easy.

At the heart of Material Design are CSS animations and transition effects. These tools let designers add movement and feedback to user actions. This makes the interface look better and work better too.

Crafting Delightful Animations

Material Design animations follow rules to make the user experience great. Some important things to remember include:

  • Consistent easing and timing: Use standard Material Design motion for natural movements.
  • Hierarchy and focus: Guide the user’s attention to key elements.
  • Feedback and responsiveness: Show visual cues for user actions and system changes.

Implementing Smooth Transitions

Material Design is all about smooth transitions between states and components. Transition effects help create a sense of flow and understanding between interface parts.

Transition Type Description Example Use Case
Fade Gradual opacity change to show/hide elements Revealing a modal or popping up a tooltip
Scale Smooth scaling of elements to indicate importance Expanding a card or button on hover
Slide Horizontal or vertical sliding motion to navigate Transitioning between pages or sliding out a drawer

Designers who get good at CSS animations and transition effects can make interfaces that grab users’ attention. This makes the interactive experience better.

Customizing Material Design Themes

Material Design lets you customize it for your project needs. You can change the colors and create new components. This makes it easy to make a unique user experience that matches your brand.

In this section, we’ll dive into Material Design customization. We’ll explore theme creation and custom components.

Variable Customization

Material Design’s customization starts with its variable system. These variables are in SCSS or CSS and are the base of the framework’s look. By changing these variables, you can adjust colors, typography, and more to fit your brand.

This control lets designers and developers make a user interface that looks great and meets their audience’s needs.

Creating Custom Components

Material Design has many pre-built components. But sometimes, you need something special for your project. By using the framework’s design rules, you can add custom components that look like they belong.

This flexibility means you can make the user experience exactly how you want it. It ensures your solution is truly unique.

“The true beauty of Material Design lies in its ability to be molded and shaped to fit the needs of any project. With its robust customization options, you can create a unique and visually stunning user experience that truly reflects your brand’s identity.”

Learning to customize Material Design lets you use its full power. You can create theme creation and custom components that take your digital products to the next level.

Material Design customization

Performance Optimization Techniques

As web designers and developers, making sure your website performs well is key. Using Material Design frameworks can really help improve how fast your site loads. We’ll look at ways to make your Material Design projects run smoothly and quickly.

Minimize CSS File Size

One big way to speed up your site is to make your CSS files smaller. This can be done by removing extra stuff like whitespace and comments. This makes your stylesheet more compact and efficient.

Optimize CSS Selectors

Also, focus on making your CSS selectors better. Try to avoid complex or nested selectors. They can slow down how fast your site loads. Use simpler, more direct selectors to make styles apply faster.

Reduce Render-Blocking Resources

Material Design sites often use lots of resources like fonts and JavaScript. These can slow down how fast your site loads. Find ways to reduce these resources to make your site load faster.

  • Defer the loading of non-critical JavaScript files
  • Use asynchronous loading techniques for scripts
  • Optimize the delivery of web fonts by leveraging browser caching and font subsetting

By using these optimization techniques, you can make your Material Design sites fast and efficient. This meets the need for quick, responsive, and good-looking digital experiences.

“Optimizing for performance is not only about delivering a better user experience, but it’s also essential for maintaining a competitive edge in today’s fast-paced digital landscape.”

Material Design Best Practices

Web applications are always changing. Keeping them web accessible and design consistent is key for a great user experience. Material Design, a modern web design framework, has its own set of best practices. We’ll look at the main guidelines for making your Material Design web apps accessible and consistent.

Accessibility Guidelines

Material Design focuses on making web apps accessible to everyone. This means your app should be usable by people with different abilities. Here are some tips to make your app accessible:

  • Make navigation clear and easy to use, with options for keyboard and screen readers.
  • Use enough color contrast between text and background for users with vision problems.
  • Use aria labels and roles for assistive tech.
  • Make sure screen readers can read out images and other non-text content.

Design Consistency

Keeping your design consistent is vital for a smooth user experience. With Material Design, aim for consistent use of these elements:

  1. Use a clear typographic hierarchy and font styles.
  2. Stick to a color palette and theme.
  3. Keep your layout and grid structure consistent.
  4. Use the same icons and visual elements.
  5. Follow the same interaction patterns and animations.

Following these best practices will make your Material Design web app accessible, easy to use, and visually appealing. This will improve the user experience for your users.

“Consistency is the key to creating a seamless and intuitive user experience, and it’s especially crucial when working with a design framework like Material Design.”

Troubleshooting Common Issues

Material Design CSS can sometimes be tricky to work with. But don’t worry, we’ve got you covered. We’ll look at fixes for common problems, like browser issues and styling conflicts.

Developers often struggle to make their Material Design sites work on all browsers. Google Chrome does a great job with Material Design, but other browsers might look a bit different. Knowing which browsers support Material Design can help you fix any problems.

Styling conflicts can also pop up when using Material Design with existing CSS. These conflicts can mess up your layout or look. To solve this, it’s key to understand how CSS works and how to change Material Design styles when needed. Using a modular coding style can also help avoid these issues.

FAQ

What is CSS Material?

CSS Material is a modern web design framework. It follows Google’s Material Design principles. It offers tools and guidelines for creating sleek, responsive, and visually appealing web interfaces.

What are the core principles of Material Design?

Material Design focuses on bold, intuitive visuals. It uses grid-based layouts and strategic typography and color. It also uses animations and transitions to enhance the user experience.

How do I get started with CSS Material frameworks?

To start with CSS Material frameworks, choose a library like Material-UI or Materialize CSS. Follow their setup guides. This involves installing the framework and linking CSS and JavaScript files in your project.

What are some of the key features of Material Design systems?

Material Design systems have responsive grid layouts and scalable typography. They offer comprehensive color palettes and customizable UI components like buttons and cards.

Popular CSS Material Design libraries include Material-UI and Materialize CSS. They offer customization, feature sets, and integration with various front-end frameworks.

How do I implement Material Design principles in my web project?

To implement Material Design, follow a structured approach. Set up the framework, configure basic settings, and use common patterns for typography, color, and animations.

What strategies can I use to optimize the performance of a Material Design-based website?

To optimize a Material Design website, use CSS minification and efficient selector targeting. Reduce render-blocking resources. Ensure your implementation follows accessibility and design consistency best practices.

How can I customize Material Design themes to fit my brand’s visual identity?

Customize Material Design themes by using variable-based theming. Modify color palettes, typography, and visual elements to match your brand. Create custom UI components to extend the design system.